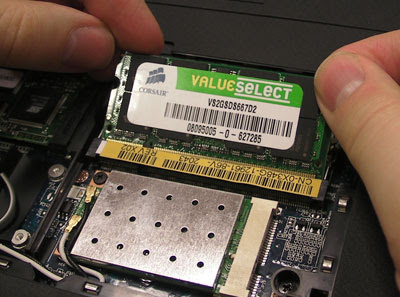
Step 3: Insert Your New DIMM
To insert your new DIMM:
Pick up the DIMM and turn it so the teeth are facing the DIMM slot and the indentation is closest to the left side of the system (the SSD chip). On most DIMM modules, this means the sticker will be face up.

Insert the DIMM at a 45 degree angle, pushing until it snaps into place and the metal retaining clips clasp into the grooves on either side of the module.
Step 4: Close and Test Your Computer
Now that you've inserted your new DIMM, it's time to close up the Inspiron Mini's chassis and turn on the computer to make sure your RAM is recognized by the system.
Snap the hatch back into place.
Tighten both screws.
Power on the computer. If the computer fails to boot (particulary if you hear a beeping noise), remove the battery to kill the power and open up the chassis again. Your new DIMM is either not fully seated in the slot or it's the wrong kind of RAM.
Hit the 2 Key right away to enter the BIOS. The BIOS screen will display the amount of RAM you have now so you can see whether it's showing the proper amount.


No comments:
Post a Comment