Add ARM to Dell Inspiron Mini 9
With the introduction of the Inspiron Mini 9, Dell has made it very easy for users to replace the system's default memory module with a higher-capacity unit. All you need to make the change are a mini philip's head screwdriver and a DDR2 PC5300 SODIMM in either 1GB or 2GB capacity.
It's important to note that the Inspiron Mini has only one DIMM slot so you will have to remove the existing 512MB or 1GB DIMM that comes preinstalled.
Note: To avoid static damage, always ground yourself before working on the inside of a computer.
Step 1: Open Upgrade Hatch
Unlike some other netbooks (see the MSI Wind), the Inspiron Mini has a hatch that provides easy access to its memory slot. To get to the memory slot:
Turn the Inspiron Mini over so the bottom is facing up.
Unscrew both screws.
Pry off the hatch gently and place it to the side.
Step 2: Remove Original DIMM
Because the Dell Inspiron Mini has only one DIMM slot, you'll need to remove the preinstalled RAM stick before you can add one of your own.
To remove the existing RAM:
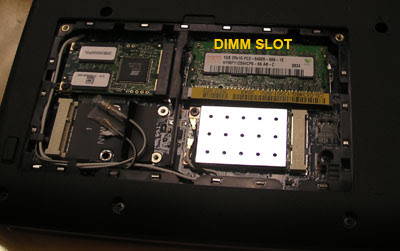
Locate the DIMM slot. If you've never installed RAM before, the DIMM is in the upper right corner of the exposed area as shown below.
Gently pull the retaining clips holding the presintalled DIMM in place until the module pops loose
Lift the old DIMM up and place it to the side. You won't need it anymore


No comments:
Post a Comment